Vinyl Flooring in Kreymer East, TX

Durable Floors That Actually Last

Waterproof vinyl flooring installation that handles Texas weather, busy families, and tight budgets without cutting corners.

A person kneeling on the floor installs dark wood-look vinyl planks, carefully placing one plank next to another on a light-colored subfloor.

Hear from Our Customers

A worker in overalls and a cap installs a wood-look laminate flooring plank in a room. Tools including a tape measure and mallet are on the floor nearby.

Professional Vinyl Flooring Installation Services

What You Get With Quality Installation

Your floors take a beating every day. Kids, pets, spills, Texas heat – regular flooring just can’t keep up. That’s where vinyl flooring makes sense.

You get floors that look like expensive hardwood but handle water without warping. No more worrying about spills in the kitchen or mud tracked in from outside. The surface resists scratches from furniture and pet claws, so your floors stay looking new longer.

Maintenance becomes simple. Sweep, mop, done. No special cleaners or refinishing schedules. Just clean floors that keep their appearance year after year, giving you one less thing to worry about in your busy life.

Kreymer East Flooring Contractors

Local Experience You Can Trust

We at Flooring Solutions and More have been installing quality floors throughout Kreymer East and surrounding Texas communities. We understand what works in our climate and what doesn’t.

Our team knows the difference between a quick job and a lasting installation. We’ve seen too many flooring failures from rushed work or cheap materials. That’s why we focus on doing it right the first time.

When you work with us, you’re working with contractors who live in this area and stand behind our work. We’re not disappearing after the job – we’re your neighbors.

A person measures and marks laminate flooring with a ruler and pencil, preparing to cut the plank. The floor has a wood-like finish, and a white underlayment is partially visible beneath the planks.

Vinyl Floor Installation Process

How We Handle Your Installation

First, we assess your space and subfloor condition. Not every floor is ready for vinyl installation, and we’ll tell you upfront what needs attention. No surprises later.

Next, we prepare the surface properly. This step determines how your floors will perform long-term. We level any uneven areas and ensure proper moisture barriers where needed.

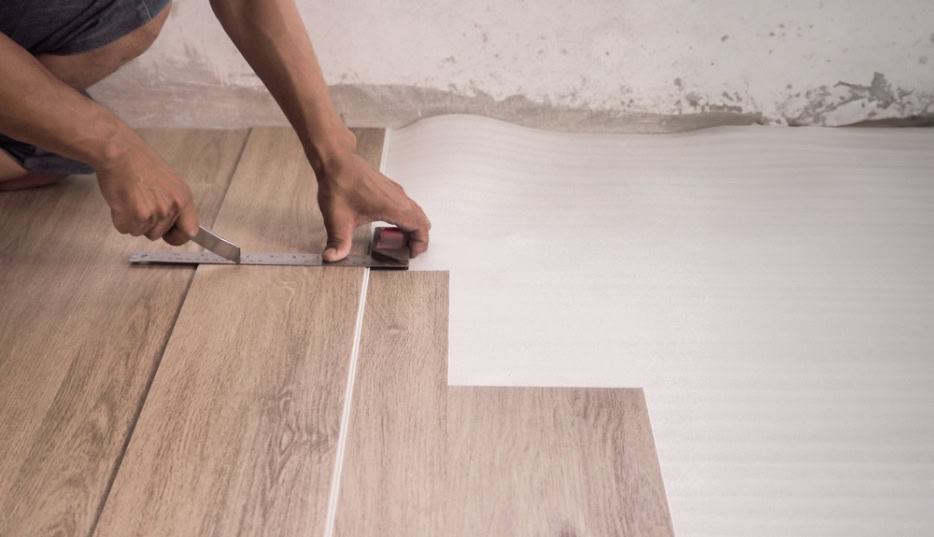
Installation happens efficiently but carefully. Each plank or tile gets positioned correctly with proper expansion gaps. We pay attention to pattern alignment and transitions between rooms.

Finally, we clean up completely and walk through the finished job with you. You’ll know how to maintain your new floors and what to expect as they settle in.

A person measures and marks laminate flooring with a ruler and pencil, preparing to cut the plank. The floor has a wood-like finish, and a white underlayment is partially visible beneath the planks.

Ready to get started?

Explore More Services

About Flooring Solutions and More

Get a Free Consultation

Complete Vinyl Flooring Services

What's Included In Every Project

Every vinyl flooring installation includes proper subfloor preparation, moisture testing, and professional installation with manufacturer-approved methods. We don’t skip steps to save time.

You’ll get help selecting the right vinyl product for your specific needs and budget. Not all vinyl flooring performs the same, and we’ll explain the differences that matter for your situation.

Our service includes moving furniture when possible, protecting your belongings during installation, and complete cleanup afterward. We also provide clear maintenance instructions and warranty information.

For existing floors, we offer vinyl floor refinishing services to restore appearance and extend life. Sometimes refinishing makes more sense than full replacement, and we’ll give you honest advice about your options.

Close-up of hands measuring and cutting a piece of wood-patterned laminate flooring with a ruler and utility knife, preparing it for installation on a white underlayment.

How long does vinyl flooring installation typically take?

Most residential vinyl flooring installations take 1-3 days depending on room size and complexity. A standard living room or bedroom usually takes one day, while whole-house projects might require 2-3 days. The timeline includes subfloor preparation, which we won’t rush because it affects how your floors perform long-term. We’ll give you a realistic schedule upfront and stick to it. Complex layouts with lots of cuts or rooms requiring subfloor work take longer, but we’d rather do it right than fast.
Luxury vinyl plank (LVP) is thicker and more durable than standard vinyl flooring. LVP typically measures 4-8mm thick with multiple layers including a tough wear layer that resists scratches and dents. Regular vinyl is thinner and less expensive but doesn’t hold up as well in high-traffic areas. LVP also looks more realistic – the textures and patterns closely mimic real hardwood. For most homes, LVP makes sense because it lasts longer and handles daily wear better. The upfront cost difference pays off in durability and appearance over time.
Sometimes, but it depends on what’s underneath and its condition. Vinyl can often go over existing vinyl, laminate, or properly prepared concrete. However, we don’t install over carpet, loose tiles, or damaged subfloors. The existing surface needs to be level, clean, and structurally sound. Installing over problem floors just transfers those problems to your new flooring. We’ll assess your current floors honestly and recommend the best approach. Sometimes removal is necessary, and we’ll explain why rather than taking shortcuts that cause problems later.
Vinyl flooring maintenance is straightforward. Sweep or vacuum regularly to remove dirt and debris that can cause scratches. Mop with a damp mop and mild cleaner – avoid harsh chemicals or excessive water. Clean spills promptly, though vinyl is waterproof so you don’t need to panic. Use furniture pads to prevent scratches from moving chairs and tables. Avoid dragging heavy items across the floor. That’s really it. No waxing, refinishing, or special treatments needed. The key is consistent basic care rather than intensive maintenance sessions.
Yes, vinyl flooring works excellently in kitchens and bathrooms because it’s completely waterproof. Unlike laminate or hardwood, vinyl won’t warp or swell from moisture. This makes it ideal for areas where spills and humidity are common. The surface is also easy to clean and doesn’t harbor bacteria like some other flooring types. For bathrooms, we pay special attention to proper installation around fixtures to maintain the waterproof seal. Many homeowners choose vinyl for these wet areas specifically because it eliminates water damage concerns while still looking attractive.
Vinyl flooring installation costs vary based on the product quality, room complexity, and subfloor condition. Basic vinyl starts around $3-5 per square foot installed, while luxury vinyl plank ranges from $5-8 per square foot. Additional costs include subfloor preparation, furniture moving, and removal of existing flooring if needed. We provide detailed estimates that break down material and labor costs so you understand exactly what you’re paying for. The investment makes sense when you consider vinyl’s durability and low maintenance requirements compared to other flooring options.